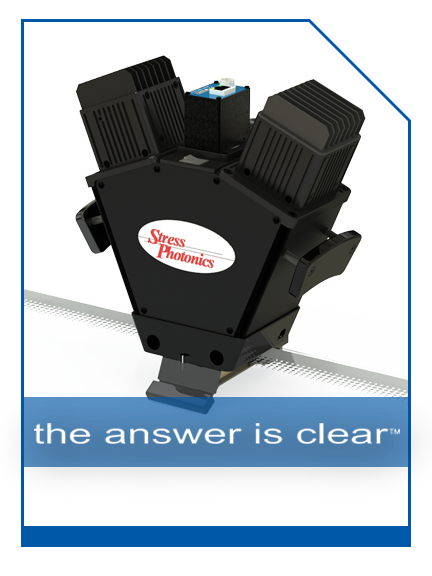
1. Positioning the EdgeMaster™ 2
Step 1 – Positioning: The first step is positioning. Simply place and hold the EdgeMaster™ 2 on the edge of the glass to position the instrument.
Product Overview » Dedicated Systems » EM 2
Product Overview » Dedicated Systems » EM 2
The EdgeMaster™ 2 is a photoelastic stress analysis system optimized for measuring edge stresses in clear or tinted glass, and glass with or without black paint. The system works on windshields, sidelights, and backlights.
The EdgeMaster 2 measures stress in:
• Laminated Glass
• Black Painted Glass
• Flat or Curved Glass
• Clear Glass
• Tinted Glass
• Tempered Glass
• Coated Glass


EdgeMaster™ software is simple to learn. Quickly set up a glass sample and immediately start making measurements. Data is updated as fast as 4X/sec. Each frame from the camera is a real-time measurement. The immediate feedback to the operator makes learning the measurement technique quick and easy.
With the EdgeMaster 2, checking edge stress is a snap. Real-time values and plots are instantaneously provided. Data is stored and is ready for further analysis and presentation in MS Excel or comparable application. Measurements are displayed continuously and recorded at each press of the button, including Tension Maximum, Location of Maximum, Compression at the Edge, Zero Stress Point Location.
Please enjoy this demonstration video of the EdgeMaster 2 Edge Stress Measurement System then contact Stress Photonics today!
With the EdgeMaster 2, stress measurements are able to be taken even on installed glass!
Please view this video of the EdgeMaster 2 In situ operation then contact Stress Photonics today!
Uses of the EdgeMaster 2 Edge Stress Measurement System include; manufacturing process set up, control of manufacturing processes, assessment of windshield glass quality, incoming material inspection, and installed glass assessments.
The EdgeMaster 2 provides critical measurements needed to quantify the quality of glass products. Key parameters that help characterize manufacturing process performance can help solve problems early by ensuring the capability and repeatability of the manufacturing process.
Maximum tensile stress and its location, maximum compressive stress, location of zero stress, and the full profile of the stress pattern from the edge inboard 50mm. These readings and others are shown on the screen and stored in a file along with measurement documentation.
| SPECIFICATION | In 2mm Glass | In 4mm Glass | UNITS |
|---|---|---|---|
| Stress Range | ±90 | ±45 | MPa |
| Resolution (low stress) | ±0.4 (Stresses ≤ 10MPa) | ±0.2 (Stresses ≤ 5MPa) | MPa |
| Resolution (high stress) | 10 | 10 | % |
| Internal Reference Standard Accuracy | ±4 | ±4 | nm |
| Spatial Resolution | Better than 0.1 | Better than 0.1 | mm |
| Measurement Update Rate | 2 | 2 | Hz |
| Specifications are general. Definitive specifications are determined by application and will be reflected in final quote. |
| SPECIFICATION | VALUE | UNITS |
|---|---|---|
| Minimum Thickness | 0.5 | mm |
| Maximum Thickness | 6 | mm |
| Glass Types | Single layer, Laminated, Tempered | |
| Tint | >30% Transmittance | |
| Coating | Black Print, Tint Band | |
| Edge Finish | Measures up to grind, extrapolates to edge. | |
| Specifications are general. Definitive specifications are determined by application and will be reflected in final quote. |
Need help? Email our expert support team via our contact form or call us at +1 (608) 224-1230
Need help? Email our support
team via our contact form
or call us at +1 (608) 224-1230

Glass Photonics was founded by Stress Photonics to better serve the glass industry.
All products are manufactured by Stress Photonics Inc.